Pages

Powered By Blogger

Sunday, January 29, 2012

Crock Pot Chocolate Peanut Clusters

Peanut clusters cooling
Last year I posted a recipe for peanut clusters made in a crock pot.  After a good bit of experimentation, the recipe has been revised for chocolate lovers.  The original recipe called for 36 ounces of white almond bark or candy coating and gave the candy a waxy texture. My revision uses only 16 ounces of white chocolate and it is worth the expense to use the real deal, no candy coating.  If you want the taste of chocolate, buy REAL chocolate. I always use a slow cooker liner so the entire bag can be removed and placed on jelly roll pans or a marble slab. If you want to skip the process of making individual clusters; use scissors to cut the bag, spread the chocolate evenly in the pans and break into bark after it has cooled. To form clusters; drop by teaspoonfuls onto wax paper and allow to cool.  


Place the following ingredients in layers in your lined crock pot:


16 oz. salted dry roasted peanuts
16 oz. unsalted dry roasted peanuts
2 - 8 oz. bars of Baker's German Sweet Chocolate, broken into blocks and chopped
8 oz. milk chocolate baking bar or 1 cup of milk chocolate chips
18 oz. semi-sweet chocolate chips (3 cups)
16 oz. white chocolate such as Baker's or Ghirardelli

Cover and cook at low temperature until melted, 2-3 hours.  (When you can see the top layer of white chocolate melting, your candy is ready).

Stir with large wooden spoon until the mixture is combined and peanuts are spread throughout.

Place bag on jelly roll pan (prepare an additional pan and line with wax paper) or large marble slab lined with wax paper and cut bag with scissors to spread on pans. For bark, simply cool and break into pieces.  For individual candies, drop by teaspoonful onto wax paper.  Makes approximately 12 dozen individual candies or two trays of bark.


Chocolate and peanut goodness!

Monday, January 23, 2012

Almond Chicken Casserole

Think about your favorite foods.  I would be willing to bet those foods trigger fond memories.  This particular recipe takes me back nearly 10 years to Toledo, Ohio.  It was prepared by my friend Melissa for our book club known as "Guacamole Joe's."  I don't exactly remember who was responsible for the name, but I do know how much fun we had at book club.  As with most, we diligently read and discussed our books in the beginning.  And we always had good food and wine. This recipe triggers memories of wonderful friends and an evening of laughter shared around the table.  I've made Almond Chicken countless times since then, but the original memory of friends I haven't seen in years is still my favorite.

Almond Chicken

5 cups diced, cooked chicken breast
2 cups diced celery
3 cups cooked rice
1 can (8 ounce) diced water chestnuts
2 cans cream of chicken soup
1/2 cup mayonnaise
2 tablespoons lemon juice
1 teaspoon salt
3/4 teaspoon fresh ground pepper
1 cup slivered almonds
1/2 cup sour cream

Preparation:  Combine all ingredients in a large mixing bowl and transfer to a 9" x 13" glass dish misted with a non-stick cooking spray.  Prepare topping (below).  Sprinkle topping over casserole and bake in 350 degree oven for 35-45 minutes.
Almond Topping

1/2 cup slivered almonds
2/3 cup butter (melted)
3 cups crushed corn flakes


Sunday, January 15, 2012

Pecan Caramel Crispies

Pecans have the most wonderful flavor.  When they are toasted the flavor becomes even more intense and nutty.  I love pecans in so many dishes, but in cookies--they are pure heaven.  My cousin gave me this recipe.  She brought them to a family get-together and I was hooked.  I followed the recipe exactly the first time I made them.  But this time some experimentation was in order by way of toasting the pecans and increasing the amount used in the recipe.  To coax a bit more flavor, the amount of vanilla was doubled, and a small square of caramel was added just before baking. When they came out of the oven a chocolate candy melt was placed on top.


Heat oven to 375 degrees F.

1/2 cup softened butter
6 tablespoons brown sugar (do not pack)
6 tablespoons granulated sugar
1 egg
1 teaspoon vanilla
1 1/4 cups all purpose flour-sifted
1 teaspoon baking powder
1/2 teaspoon baking soda
1/2 teaspoon salt
1/ 1/4 cups toasted chopped pecans (spread on baking sheet and bake at 375 for 5-6 minutes)
about 15 unwrapped caramels- halved

Cream butter and sugars until light.  Beat in egg and vanilla.  Sift together dry ingredients; blend into creamed mixture. Stir in nuts.

Drop by rounded teaspoon on baking sheet lined with Silpat. Place 1/2 caramel in middle of cookie and press lightly.  Bake 10-12 minutes.  Remove from oven. If desired place milk chocolate or semi sweet chocolate such as Wilton cookie melts on top of cookie. Cool cookies slightly before removing from pan.

Makes approximately 2 1/2 dozen cookies.

Friday, October 14, 2011

Mini Toffee Apple Pies

Fall weather comes late to the Carolinas; at least to an Ohio transplant who associates fall with Labor Day. It is the middle of October and I am still wearing shorts and sandals. In the higher elevations, a 90 minute drive from Charlotte, there are wonderful apple orchards. On a recent unexpectedly crisp Sunday afternoon, my sister Joy and I drove to Hendersonville so she could finally pick the elusive Arkansas Black apples she was craving. Nestled in the mountains was an orchard stretching for acres and acres with dozens of varieties. We fortified ourselves with a fresh apple donut, fetched our 1/2 bushel baskets and set out on our quest for Arkansas Blacks; map in hand. Joy found her apples and filled her basket. I decided on three varieties and added Golden Delicious for my dad and Pink Lady because a sample tasted so delicious. Of course I made an apple pie, but developed this recipe as a handheld dessert for my brother's 50th birthday party. It's a scrumptious little pie. The apples are sweetened with brown sugar, and toffee bits are a wonderful addition.

Mini Toffee Apple Pies      Yield:  Approximately 12-15


Ingredients:
Double pie crust recipe or refrigerated double pie crust/softened
2 medium-sized tart apples such as Granny Smith; peeled, cored and chopped
1/3 cup packed brown sugar
1/2 cup toffee bits
2 tablespoons melted butter
2 tablespoons flour
1/8 teaspoon salt

Place chopped apples in 10" skillet on medium heat.  Cook until slightly soft, approximately 5-7 minutes. While apples are cooking, combine remaining ingredients in a medium mixing bowl. Add cooked apples and mix until combined.

Roll 1/2 of dough or one prepared crust on floured board.  Using 4" round cutter, cut circles and place on baking sheet covered in Silpat or foil. Repeat with remaining dough and place on second  baking sheet. Using approximately one teaspoon of filling, place on 1/2 half of dough toward the center. Fold dough in half and crimp with fork.
Bake in oven at 400 degrees F for the first 6 minutes and reduce heat to 350 degrees F for 6 more minutes or until golden brown.

Mini Toffee Apple Pies

Saturday, June 25, 2011

Fresh Peach Pie

It's summer, and fresh produce is abundant. This morning I arrived at the Davidson Farmer's Market just as it opened. Davidson is a small college community near Charlotte, and the Farmer's Market is clearly a social gathering spot for all ages. I head for the table laden with fresh Amish donuts to retrieve my breakfast splurge. There is already a long line, two deep and the donuts go quickly.  For a buck fifty I buy an enormous raised and glazed donut.  It is soft and smells of yeast with a sweet, sugary glaze.  To counteract my act of decadence, I also buy a pint of fresh blueberries and feel vindicated as I slowly consume my treat.

Here in the south, peach season is in full swing. I can smell the peaches even before I see them lined up in perfect rows on the grower's table.  Some have stems with beautiful green leaves still attached.  They are tinged with a beautiful rose blush as though God has touched each one.

Every cooking magazine for June and July seems to have cover photos of peach desserts.  For me, the first peaches beg to become a pie.  The perfect pie smells and tastes of peaches, pure and simple.  Not too sweet, the peaches not too soft; a pie should be an homage to the peach.  The pie pastry should be flaky, with a lattice crust to show off the beautiful colors of every slice.  This is summer!
Summer Peach Pie
To peel a peach:  Fill a large pot with water and bring to a boil.  Drop peaches into water for about 10 seconds and remove with a slotted spoon to a large cutting board.  The skins will peel off easily with a paring knife.

Summer Peach Pie    

Preheat oven to 400 degrees F.

1 recipe double crust pie dough of your choice
6 - 7 cups of fresh sliced peaches
1 cup of sugar
2 tablespoons cornstarch
1 tablespoon fresh lemon juice
1/2 teaspoon of almond extract or vanilla extract (Your choice-but I love peaches with almond flavoring)
1 tablespoon melted butter if the peaches are not fresh and juicy (I usually don't add butter)

Slice peaches and place in a large mixing bowl.  Toss with fresh lemon juice and extract of your choice.  Combine the sugar and cornstarch.  Add to peaches and mix gently.

Roll half of pie crust and place in deep dish pie plate.  Add peach mixture and top with melted butter if desired.  Roll remaining pie crust and cut into strips 3/4" to 1" wide.  Form lattice crust with an under and over pattern. Cover pie with foil and bake 35 minutes in 400 degree oven.  Remove foil and bake an additional 20 minutes uncovered.  Remove from oven and let cool on baking rack.  Enjoy the taste of summer!

Saturday, May 21, 2011

Insalata Caprese with Fresh Basil Pesto Topping

Basil is wonderfully fragrant and so flavorful.  Last year I carefully planted basil in patio containers.  Critters carefully ate almost all of the plants.  This year my basil plant was purchased at the nearby Davidson Farmer's Market the day before Easter.  It was carefully planted...but this time the pot was placed on a small patio table instead of on the ground.  It has been yielding beautiful, perfect green leaves right from the start.  

One of my favorite uses for basil is pesto.  There are so many recipes from which to choose.  After years of trying a virtual plethora of recipes, I've got a winner.  And it really isn't a recipe at all.  It's more of an old fashioned 'handful of this and pinch of that' recipe.  At my house pesto is eaten on bread, pasta and Caprese salad. Basil has so many uses, and so does pesto! 

Fresh Basil Pesto

A large handful of fresh basil leaves (about 1 cup packed) washed and patted dry with a paper towel
A few sprigs of parsely (about 1/4 cup) washed and patted dry with a paper towel
Fresh minced garlic to taste (1/2 to 2 cloves as your preference dictates)
A small handful of pine nuts (about 1/4 cup), toasted if desired
1/3 to 1/2 cup freshly grated Reggiano Parmesano cheese 
Extra virgin olive oil 

Place all ingredients except olive oil in a food processor or mini food processor and pulse until pine nuts are chopped.  Add olive oil in small amounts and pulse until you reach desired consistency.  Sprinkle with sea salt to taste.  The addition of parsley helps the pesto keep a beautiful green color and fresh taste.

For the Caprese salad slice a ripe tomato, layer or top with fresh mozzarella slices and fresh basil leaves.  Drizzle with aged Balsamic vinegar and extra virgin olive oil. Top with a spoonful of pesto and enjoy!

The Do It Yourself Project or How to Bite Off More Than You Can Chew

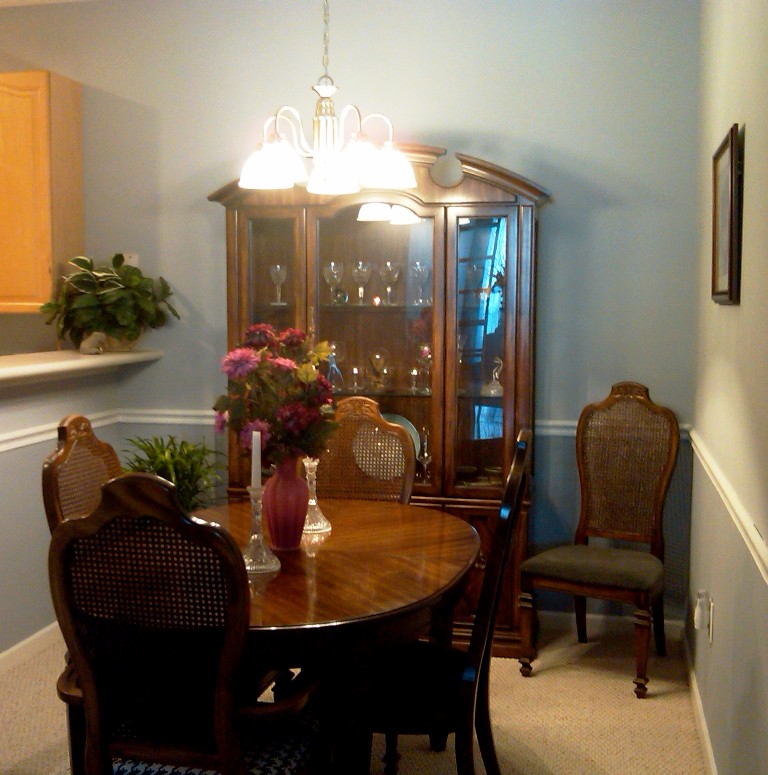
Dining Room-Before

March brings thoughts of Spring and cleaning.  This year I took Spring cleaning to the extreme.  After living in my home for five years and  recently refinancing, it was time for a face lift.  My house was move-in condition when I bought it. Not my color choices, but not bad enough to change back then.

One Sunday morning while eating breakfast I decided the wallpaper had to go.  It was shades of green, beige, burgundy and just plain ugly.  I began the process by tearing a piece in a spot that would not be missed by anyone walking through my front door.  No turning back now!  Each night I would come home from work and tear more paper.  It was a solitary project. Just me. Read--no help. What was I thinking?!  I have nine foot ceilings, 36" cupboards and I'm not much over five feet tall!  Neighbors to the rescue with a taller ladder.  

It is now nearly mid-May and I'm working hard to complete my painting mission.  The kitchen and dining room are finished and the result is a wonderful transformation.  So much so, I started on the living room. Read-not in the original plan, there are vaulted ceilings, but I can't stop in the middle of the room! My deadline for completion is fast approaching. Memorial Day is looming and I have vowed to have the painting finished. 

The first weekend in June will bring friends from Ohio, Virginia and maybe Florida for a girls get-together.  My friend Sherry says they are coming to see me, not my house.  At least it will look fresh and clean.  Nothing like having company to get everything spruced up.  I just bit off more than I can chew. Speaking of chewing--that reminds me, I have a menu to plan for an entire weekend. Now that is a project I will enjoy.
Dining Room - After